Tutorial to Install Ubuntu on Raspberry Pi [2021 Edition]
In this tutorial post, we will show you the process of installing Ubuntu Linux on a Raspberry Pi. In other news, Ubuntu 22.04 LTS is available for download.
How To Install Ubuntu On Raspberry Pi
Basic requirements to install Ubuntu on Raspberry Pi.
- A microSD card (4GB minimum, 8GB recommended)
- A computer with a microSD card drive
- A Raspberry Pi 2, 3 or 4
- A micro-USB power cable (USB-C for the Pi 4)
- An internet connection( Wi-Fi network or an ethernet network)
First, You need to download the Ubuntu imager for Raspberry Pi from the official website of Pi.
Download link >> Raspberry Pi imager
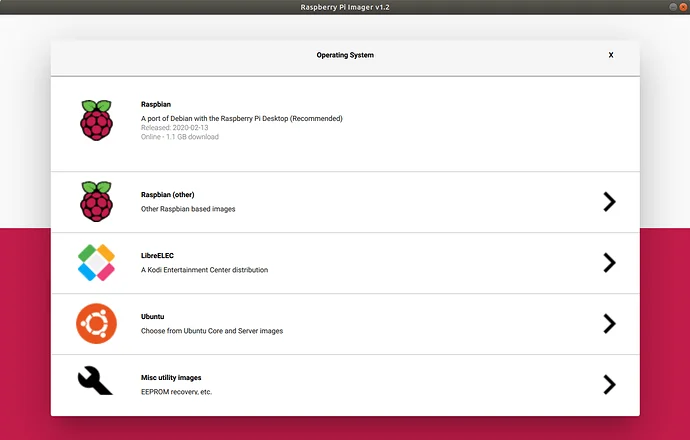
Now, we need to create a bootable microSD card and for that, insert the microSD card into your computer and start the Raspberry Pi Imager which you have downloaded from the official website.
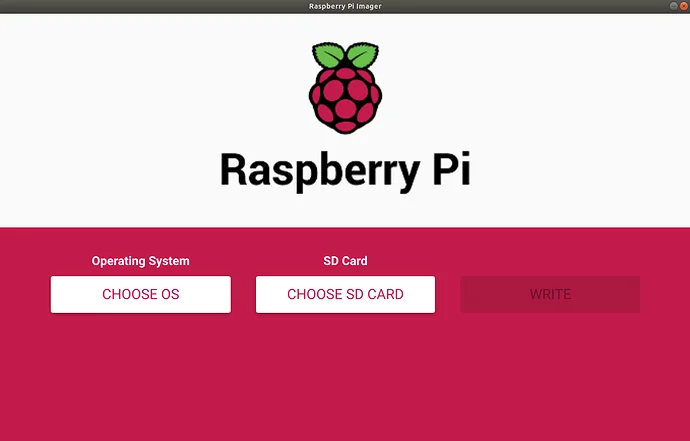
Click on the “CHOOSE OS” option and select the Ubuntu operating system.
You will see a list of Ubuntu downloads to choose from. You can also see the latest version of Ubuntu, Ubuntu 20.04 LTS in the list.
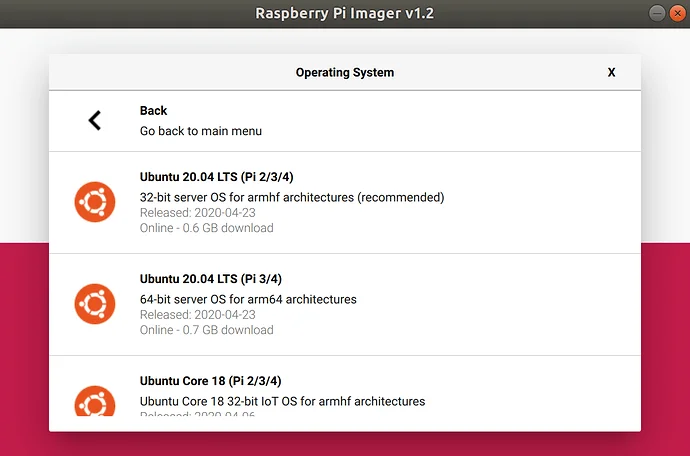
We are going with Ubuntu 18.04 LTS. Select the image and open the “SD Card” menu, and click on the write option.
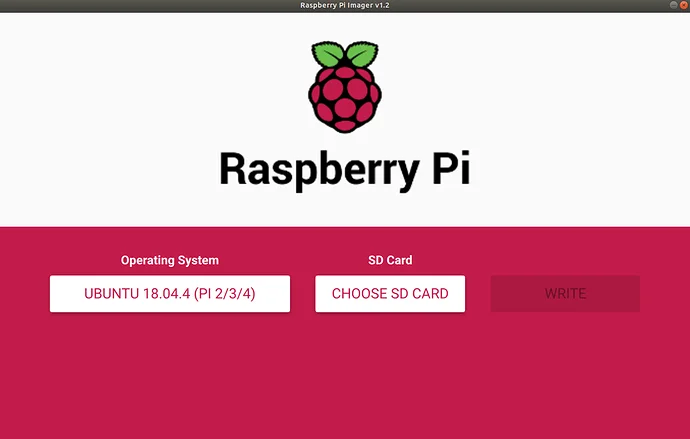
Wait for a while and you are ready to go with bootable microUSD for Raspberry Pi.
Now, you need to configure the internet setting.
With the SD card still inserted in your laptop, you need open a file manager and navigate to the “system-boot” partition on your card. Now, Edit the network-config file to add your Wi-Fi credentials.
wifis:
wlan0:
dhcp4: true
optional: true
access-points:
<wifi network name>:
password: "<wifi password>"
Now, after supplying your wifi network details, save the file and remove the card from your laptop.
Start Booting Raspberry Pi:
If you are using screen and keyboard, you should connect your HDMI screen and a USB keyboard before powering the Pi.
You will see the booting process. You can log in using “ubuntu” as both the password and login ID.
Note: If you are running your Raspberry PI headless, you need to connect to it remotely from your laptop.
For the remote connection, We are going to use the SSH protocol.
After a minute or so, Ubuntu on your Raspberry Pi will have fully booted and your device will get connected to the network.
To determine the IP address of your board, open a terminal and run the arp command on Ubuntu:
arp -na | grep -i "b8:27:eb"
Open a terminal and run the following command:
ssh ubuntu@<Raspberry Pi’s IP address>
You need to confirm the connection:
Are you sure you want to continue connecting (yes/no/[fingerprint])?
Type “yes” to confirm. You are now connected to Ubuntu Server running on your Raspberry Pi.
Just in case if you want to install the desktop environment, run the following commands.
Run the following commands to ensure your packages are updated to the latest version:
sudo apt update
sudo apt upgrade
We are using lubuntu desktop environment for this tutorial. Run the following command to install the desktop environment in Raspberry Pi with Ubuntu:
sudo apt install lubuntu-desktop
Once the install finishes, you need to reboot your Pi:
sudo reboot
You are ready to use Raspberry Pi with GUI.