Insight: Install Nagios Monitoring Tool On RHEL 8
In this tutorial, we will show you the method to install the Nagios monitoring tool on Redhat operating system. Nagios or Nagios Core is an open-source IT monitoring, server, network monitoring,
How To Install Nagios Monitoring Tool On RHEL 8
At first, you need to install the dependencies like Apache HTTP server and PHP. Run the command below to install:
dnf install -y gcc glibc glibc-common perl httpd php wget gd gd-devel
Run the following commands to start the HTTPD service and enable HTTPD to automatically start at the time of system boot.
systemctl start httpd
systemctl enable httpd
Now, you need to download the Nagios Core file in your system and compile it.
wget -O nagioscore.tar.gz https://github.com/NagiosEnterprises/nagioscore/archive/nagios-4.4.3.tar.gz
tar xzf nagioscore.tar.gz
cd nagioscore-nagios-4.4.3/
Now, run the following commands to configure the source package and build it in your system using make command:
./configure
make all
Create the Nagios user and group. After creating, add the Apache user to the Nagios group with the command below:
make install-groups-users
usermod -a -G nagios apache
Install the binary files, CGIs, and HTML files:
make install
make install-daemoninit
It’s time to install and configure the external command file, a sample configuration file, and the Apache-Nagios configuration file.
make install-commandmode
make install-config
make install-webconf
Now, create an Nagios Administrator account.
htpasswd -c /usr/local/nagios/etc/htpasswd.users nagiosadmin
Now, install the required dependencies to install Nagios plugins.
dnf install -y gcc glibc glibc-common make gettext automake autoconf wget openssl-devel net-snmp net-snmp-utils
Downlaod and extract the Nagios plugins with the following command:
wget --no-check-certificate -O nagios-plugins.tar.gz https://github.com/nagios-plugins/nagios-plugins/archive/release-2.2.1.tar.gz
tar zxf nagios-plugins.tar.gz
Compile, build and install the Nagios plugins with the commands below:
cd nagios-plugins-release-2.2.1/
./tools/setup
./configure
make
make install
Run the following command to start and enable Nagios service.
systemctl restart httpd.service
systemctl start nagios.service
systemctl start nagios.service
systemctl start nagios.service
Run the following commands to open port 80 in firewall.
firewall-cmd --permanent --zone=public --add-port=80/tcp
firewall-cmd --reload
Disable SELinux or set it in permissive mode.
sed -i 's/SELINUX=.*/SELINUX=disabled/g' /etc/selinux/config
setenforce 0
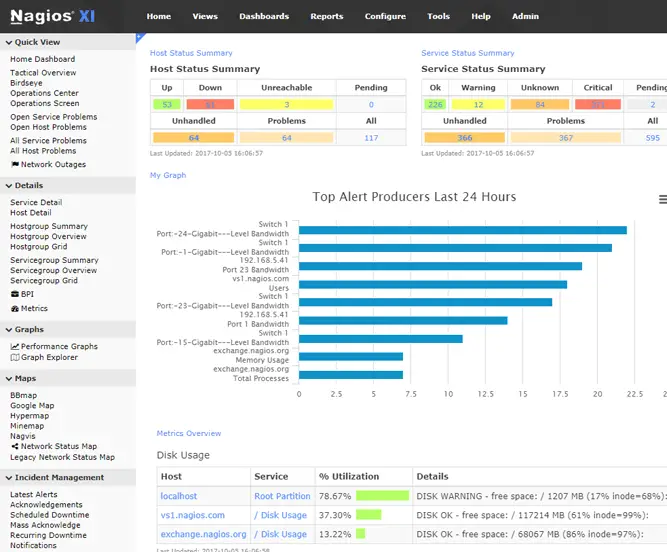
You can now access the Nagios web console from your web browser.
http:ip-address/nagios


![Fix Linux and Windows Showing Different Times [Dual Booting]](https://itsubuntu.com/wp-content/uploads/2020/04/Fix-Linux-and-Windows-Showing-Different-Times-Dual-Booting.png)