Insight: Tutorial To Install OBS In Linux Operating System 2023
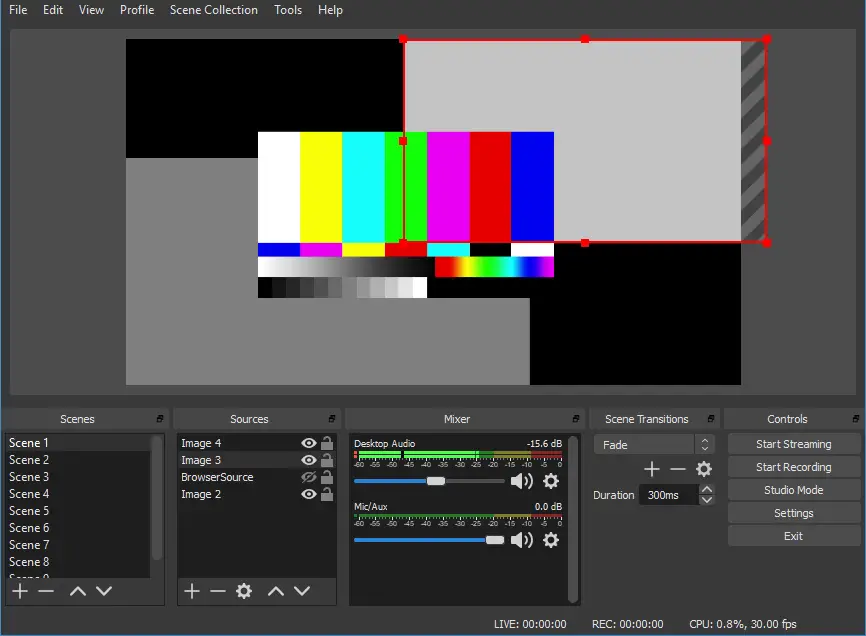
In this tutorial post, we are going to show you the methods to install OBS in Linux based operating system. OBS or Open Broadcaster Software is a free and open-source software for video recording and live streaming. It is a cross-platform software and is available for multiple platforms.
Install OBS In Linux Operating System 2023
Basic Requirements For OBS
- OpenGL 3.2 compatible GPU
- X window system
How To Install OBS in Ubuntu
- xserver-xorg version 1.18.4 or newer is recommended to avoid potential performance issues with certain features in OBS, such as the fullscreen projector.
- FFmpeg is required. If you do not have FFmpeg installed (if you’re not sure, then you probably don’t have it), you can get it with the following commands:
sudo apt-get install ffmpeg - Then you can install OBS with the following commands, make sure you enabled the multiverse repo in Ubuntu’s software center (NOTE: On newer versions of Ubuntu adding a repository automatically apt updates.):
sudo add-apt-repository ppa:obsproject/obs-studio
sudo apt-get update
sudo apt-get install obs-studio
How to install OBS In Arch Linux Installation (Unofficial)
- The “Release” version is available on the community repository:
sudo pacman -S obs-studio - “Git” version is available on AUR: https://aur.archlinux.org/packages/obs-studio-git
Manjaro Installation (Unofficial)
- Graphical: search “obs-studio” on Pamac Manager or Octopi
- Command-line: install it via Pacman with the following command:
sudo pacman -S obs-studio
Fedora Installation (Unofficial)
- OBS Studio is included in RPM Fusion. If you do not have it configured (if you’re not sure, then you probably don’t have it), you can do so with the following command:
sudo dnf install https://download1.rpmfusion.org/free/fedora/rpmfusion-free-release-$(rpm -E %fedora).noarch.rpm https://download1.rpmfusion.org/nonfree/fedora/rpmfusion-nonfree-release-$(rpm -E %fedora).noarch.rpm - Then you can install OBS with the following command (this pulls all dependencies, including NVENC-enabled ffmpeg):
sudo dnf install obs-studio - For NVIDIA Hardware accelerated encoding make sure you have CUDA installed (in case of an older card, install xorg-x11-drv-nvidia-340xx-cuda instead):
sudo dnf install xorg-x11-drv-nvidia-cuda
OpenMandriva Installation (Unofficial)
- OBS Studio is included in OpenMandriva Lx3 non-free repository and in restricted repository for upcoming Lx4 release – available now as Cooker.For OpenMandriva Lx3:
- Graphical: search and install “obs-studio” on “OpenMandriva Install and Remove Software” (Rpmdrake)
- Command-line: install it as root (su or sudo) via terminal/konsole with the following command:
urpmi obs-studioFor OpenMandriva Lx4:
- Graphical: search and install “obs-studio” on “OpenMandriva Software Management” (dnfdragora)
- Command-line: install it as root (su or sudo) via terminal/konsole with the following command:
dnf install obs-studio
openSUSE Installation (Unofficial)
- The Packman repository contains the obs-studio package since it requires
the fuller version of FFmpeg which is in Packman for legal reasons. If you
do not already have the Packman repository add it as shown below.For openSUSE Tumbleweed:sudo zypper ar --refresh --priority 90 http://packman.inode.at/suse/openSUSE_Tumbleweed packmanFor openSUSE Leap 15.0:
sudo zypper ar --refresh --priority 90 http://packman.inode.at/suse/openSUSE_Leap_15.0 packmanFor openSUSE Leap 42.3:
sudo zypper ar --refresh http://packman.inode.at/suse/openSUSE_Leap_42.3 packmanIt is recommended to set the priority for Packman lower so it takes
precedence over base repositories (skip on Tumbleweed as included in initial command).sudo zypper mr --priority 90 packman - The Packman version of FFmpeg should be used for full codec support. To
ensure any existing FFmpeg packages are switched to Packman versions
execute the following before installing obs-studio.sudo zypper dup --repo packman - Install the obs-studio package.
sudo zypper in obs-studio - Links:
- 1 click install, direct rpm links, and download counts:
http://packman.links2linux.org/package/obs-studio - Build information:
https://pmbs.links2linux.de/package/show/Multimedia/obs-studio
- 1 click install, direct rpm links, and download counts:
Gentoo Installation (Unofficial)
- Command-line: can be installed using portage by the following command:
sudo emerge media-video/obs-studio
See https://packages.gentoo.org/packages/media-video/obs-studio for available versions and more information
NixOS Installation (Unofficial)
nix-env -i obs-studioSee https://nixos.org/wiki/OBS for further instructions
Deepin Installation (Unofficial)
Deepin 15.4 or newer is required.
- First make sure you have everything up-to-date.
sudo apt-get update - FFmpeg is required. If you do not have the FFmpeg installed (if you’re not sure, then you probably don’t have it), you can get it with the following command (or compile it yourself):
sudo apt-get install ffmpeg - Finally, install OBS Studio.
sudo apt-get install obs-studio
Debian Installation (Unofficial)
Debian 9.0 or newer is required.
- First, make sure you have everything up-to-date.
sudo apt update - FFmpeg is required. If you do not have the FFmpeg installed (if you’re not sure, then you probably don’t have it), you can get it with the following command (or compile it yourself):
sudo apt install ffmpeg - Finally, install OBS Studio.
sudo apt install obs-studio
Void Installation (Unofficial)
- First make sure your repositories are up-to-date. OBS is available on the
multilibrepos if you need the 32-bit build.sudo xbps-install -S - Then just install OBS Studio. Any missing dependencies will be installed automatically.
- If it refuses to install, try running
sudo xbps-install -Suto update everything first.sudo xbps-install obs
- If it refuses to install, try running
Though unofficial, the package is actively maintained and functional!
snappy Installation (Unofficial)
- If you haven’t already, install snapd (ignore the Support Overview which is outdated).
- Install OBS Studio.
sudo snap install obs-studio
Linux Build Directions
Note: as of May 1, 2019, Facebook live now mandates the use of RTMPS. That functionality requires your distro’s mbed TLS package, which obs-studio/cmake/Modules/FindMbedTLS.cmake script searches for at compile time.
Red Hat/Fedora-based Build Directions
- Get RPM fusion at http://rpmfusion.org/Configuration/ (Nux Desktop is an alternative that may include better packages for RHEL/CentOS 7)
- Get the required packages:
sudo yum install \
         make \
         gcc \
         gcc-c++ \
         gcc-objc \
         cmake \
         git \
         libX11-devel \
         mesa-libGL-devel \
         libv4l-devel \
         pulseaudio-libs-devel \
         libspeexdsp-devel \
         x264-devel \
         freetype-devel \
         fontconfig-devel \
         libXcomposite-devel \
         libXinerama-devel \
         qt5-qtbase-devel \
         qt5-qtx11extras-devel \
         qt5-qtsvg-devel \
         libcurl-devel \
         systemd-devel \
         ffmpeg \
         ffmpeg-devel \
         luajit-devel \
         python3-devel \
         mbedtls \
         mbedtls-devel \
         swig
If libspeexdsp-devel is not available, it can be built from source (https://git.xiph.org/?p=speexdsp.git;a=summary)
- Building and installing OBS:
git clone --recursive https://github.com/obsproject/obs-studio.git cd obs-studio mkdir build && cd build cmake -DUNIX_STRUCTURE=1 .. make -j4 sudo make install - By default obs installs libraries in /usr/local/lib. To make sure that the loader can find them there, create a file /etc/ld.so.conf.d/local.conf with the single line
/usr/local/liband then run
sudo ldconfig
Debian-based Build Directions
- Get the required packages:
sudo apt-get install \ build-essential \ checkinstall \ cmake \ git \ libmbedtls-dev \ libasound2-dev \ libavcodec-dev \ libavdevice-dev \ libavfilter-dev \ libavformat-dev \ libavutil-dev \ libcurl4-openssl-dev \ libfdk-aac-dev \ libfontconfig-dev \ libfreetype6-dev \ libgl1-mesa-dev \ libjack-jackd2-dev \ libjansson-dev \ libluajit-5.1-dev \ libpulse-dev \ libqt5x11extras5-dev \ libspeexdsp-dev \ libswresample-dev \ libswscale-dev \ libudev-dev \ libv4l-dev \ libvlc-dev \ libx11-dev \ libx264-dev \ libxcb-shm0-dev \ libxcb-xinerama0-dev \ libxcomposite-dev \ libxinerama-dev \ pkg-config \ python3-dev \ qtbase5-dev \ libqt5svg5-dev \ swig - Building and installing OBS:
git clone --recursive https://github.com/obsproject/obs-studio.git
cd obs-studio
mkdir build && cd build
cmake -DUNIX_STRUCTURE=1 -DCMAKE_INSTALL_PREFIX=/usr ..
make -j4
sudo checkinstall --default --pkgname=obs-studio --fstrans=no --backup=no \
       --pkgversion="$(date +%Y%m%d)-git" --deldoc=yes
openSUSE Build Directions
- See openSUSE installation instructions (above) for details on adding Packman repository.
- Install build dependencies:
sudo zypper in cmake \ fontconfig-devel \ freetype2-devel \ gcc \ gcc-c++ \ libcurl-devel \ ffmpeg2-devel \ libjansson-devel \ libpulse-devel \ libspeexdsp-devel \ libqt5-qtbase-devel \ libqt5-qtx11extras-devel \ libudev-devel \ libv4l-devel \ libXcomposite-devel \ libXinerama-devel \ libXrandr-devel \ luajit-devel \ mbedtls \ swig \ python3-devel - Building and installing OBS:
git clone --recursive https://github.com/obsproject/obs-studio.git
cd obs-studio
mkdir build && cd build
cmake -DUNIX_STRUCTURE=1 -DCMAKE_INSTALL_PREFIX=/usr ..
make -j4
sudo make install
Linux portable mode (all distros)
- You can build in portable mode on Linux, which installs all the files to an isolated directory:
mkdir build && cd build
cmake -DUNIX_STRUCTURE=0 \
        -DCMAKE_INSTALL_PREFIX="${HOME}/obs-studio-portable" ..
make -j4 && make install
After that you should have a portable install in ~/obs-studio-portable. Change to bin/64bit or bin/32bit and then simply run: ./obs
FreeBSD
FreeBSD Installation (Unofficial)
- Install OBS Studio:pkg install obs-studio
FreeBSD Build Directions
- The easiest way to build OBS Studio from source is to use the FreeBSD Ports and modify the
multimedia/obs-studioport to suite your needs. - First you have to set up the ports infrastructure on your system. See the related chapter in the FreeBSD Handbook.
- Once you’ve got your ports tree at
/usr/portsyou may edit themultimedia/obs-studioport to your liking. Then, you may build and install the port with:cd /usr/ports/multimedia/obs-studio
make install clean


![How To Remove Files And Directories In Linux [Examples]](https://itsubuntu.com/wp-content/uploads/2022/03/How-To-Remove-Files-And-Directories-In-Linux-.jpg)